


Intel Nuc Performance Kit: How To Get The Most Out Of Your New Build
You’ve just got your new Intel NUC performance kit and you’re eager to see what it can do. But before you start benchmarking and testing out its limits, there are a few things you should do to get the most out of your new build. In this blog post, we’ll walk you through everything you need to know about optimising your Intel NUC performance kit, from BIOS settings to software tweaks. By the time you’re done reading, you’ll be able to get the most out of your new NUC and enjoy top-notch performance.
What is an Intel Nuc?
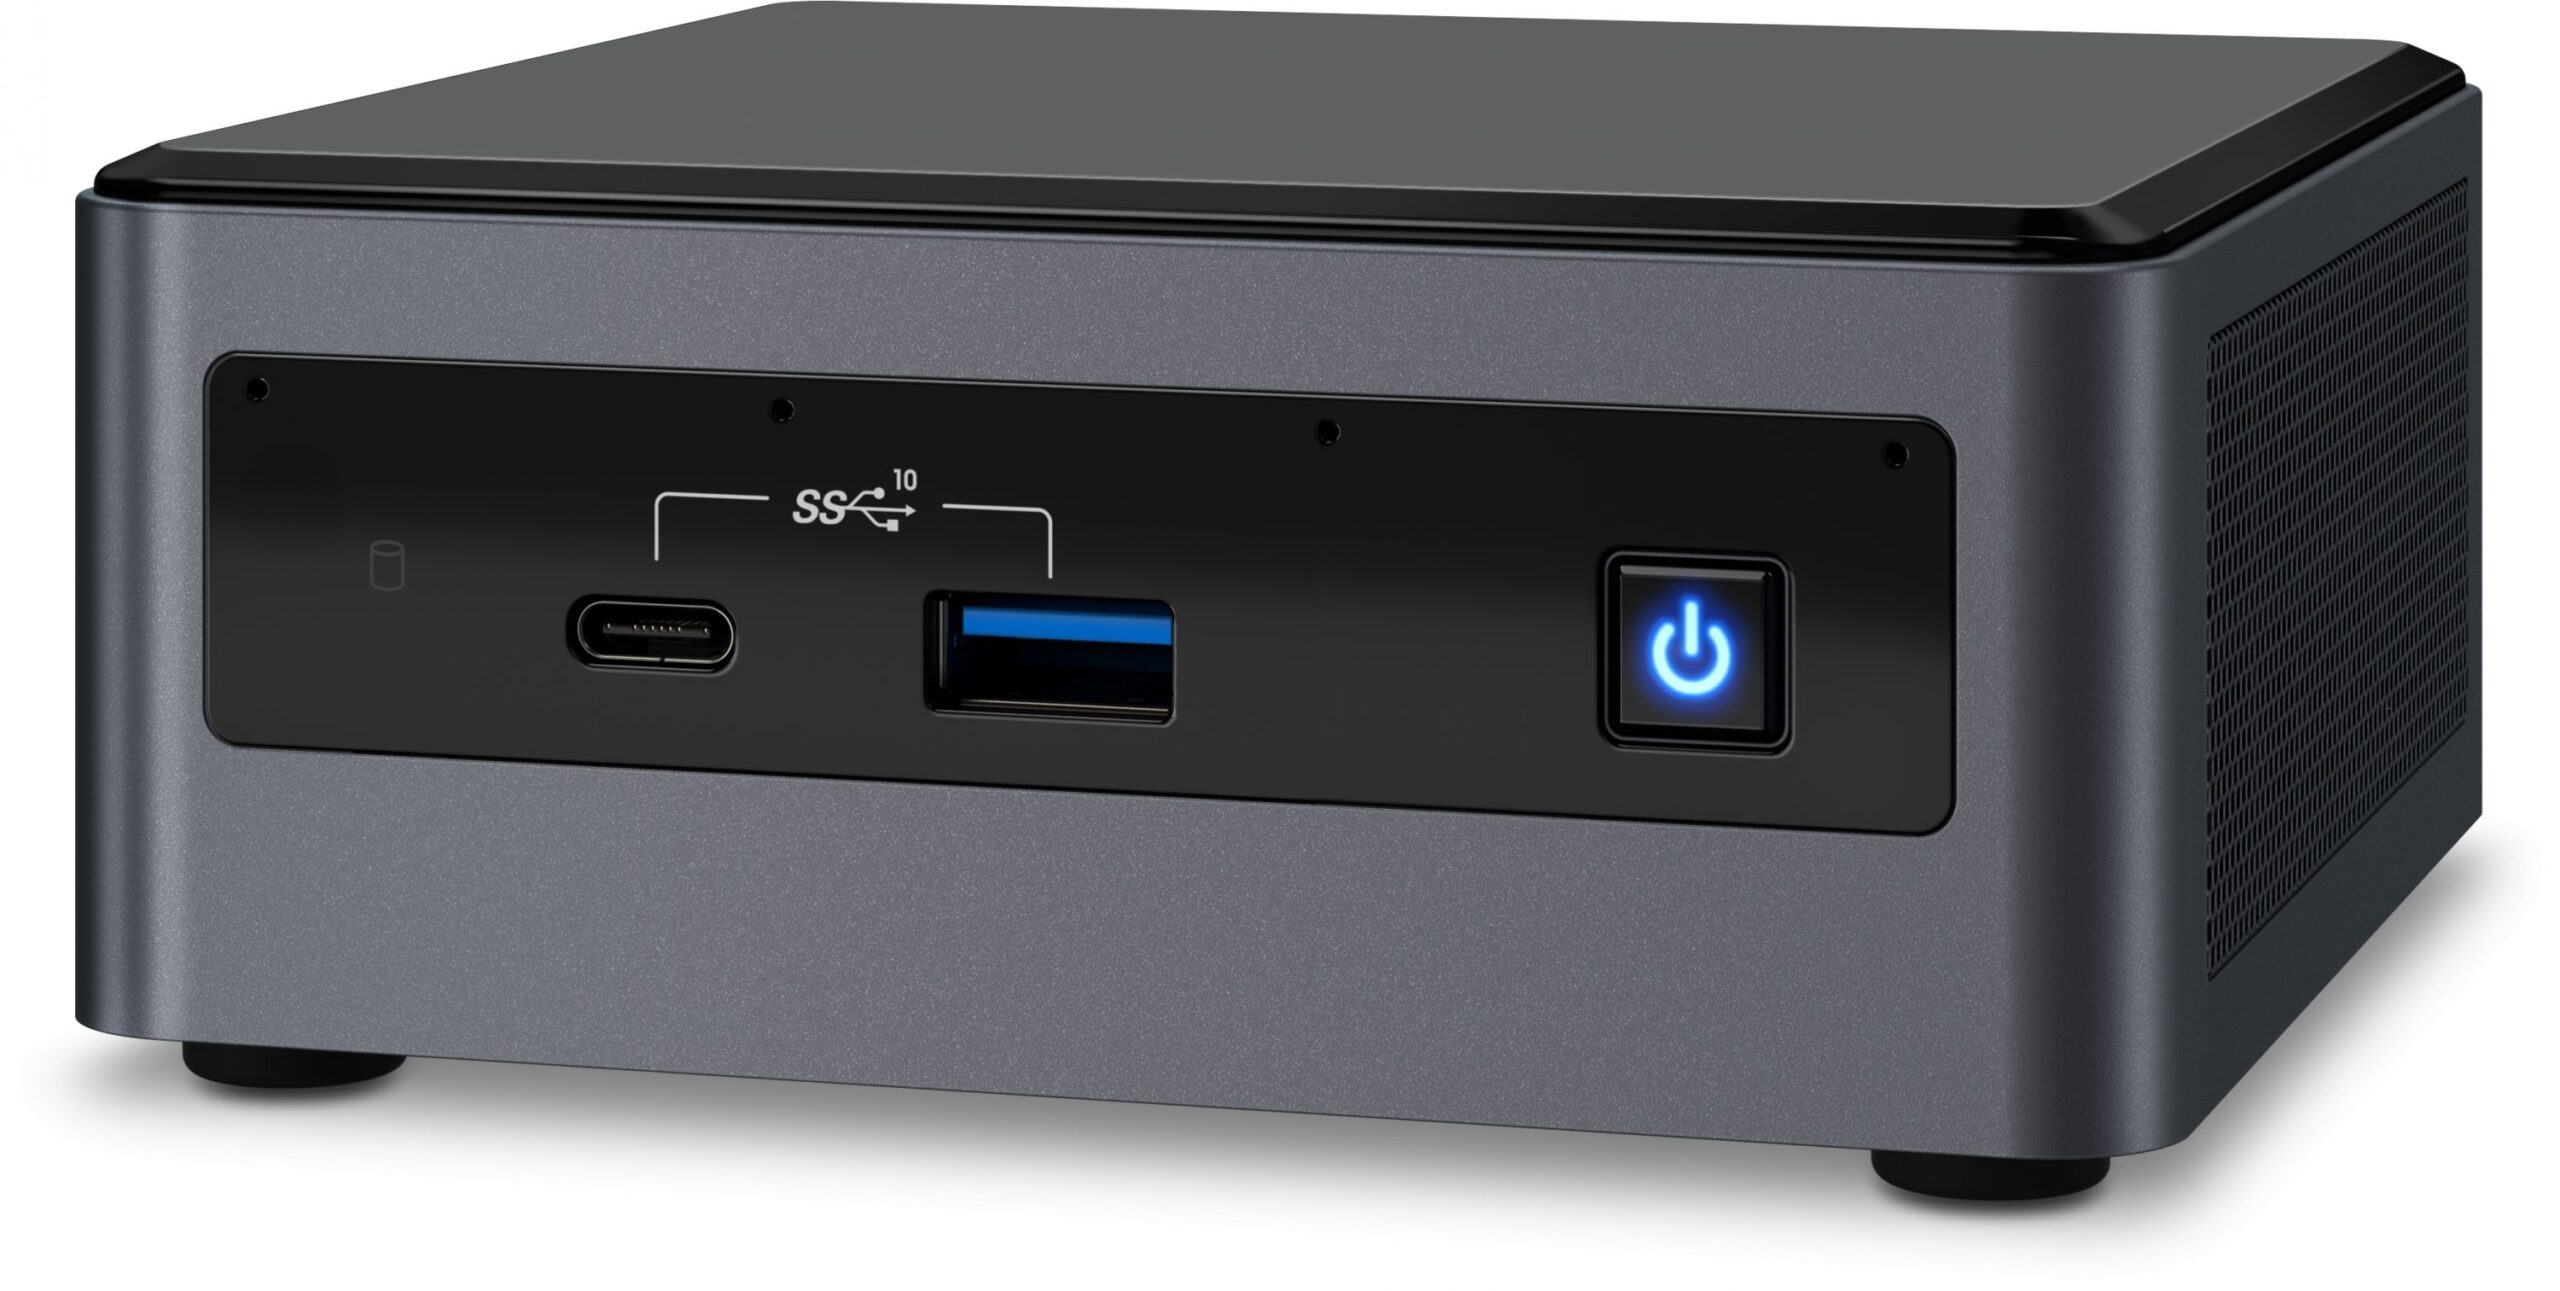
An Intel Nuc is a miniaturized, high performance computer that has been specifically designed for use in embedded systems and small form factor systems. It is powered by an Intel Core processor and features integrated graphics, memory, and storage. The Nuc’s small size and low power consumption make it an ideal solution for space-constrained applications.
The Nuc’s compact form factor also makes it a great choice for use as a home theater PC or gaming console. Its powerful processor and graphics capabilities allow it to handle demanding tasks such as 4K video playback and gaming at high frame rates.
While the Nuc’s size and power efficiency are its main selling points, its performance is also impressive. In our testing, we found that the Nuc was able to handle all of our workloads without any issues. It even managed to hold its own against larger computers in some benchmarks.
Overall, the Intel Nuc is a great option for those looking for a powerful yet small form factor computer. It is well suited for a variety of use cases and should have no trouble handling even the most demanding tasks.
How to Build an Intel Nuc
When it comes to building an Intel Nuc, there are a few things you need to keep in mind in order to get the most out of your new build. First and foremost, you need to make sure that you have a compatible motherboard. Secondly, you need to choose the right components for your needs. And lastly, you need to follow the proper assembly instructions.
Compatible Motherboard:
The first thing you need to do when building an Intel Nuc is to find a compatible motherboard. The best way to do this is by visiting the Intel website and looking up the specifications for your particular model of Nuc. Once you have found a compatible motherboard, you can then proceed to choosing the right components for your needs.
Choose The Right Components:
Choosing the right components for your Intel Nuc is important in order to get the most out of your new build. You need to consider what type of tasks you will be using your Nuc for in order to choose the appropriate components. For example, if you plan on using your Nuc for gaming, then you will need to choose a powerful processor and graphics card. On the other hand, if you only plan on using your Nuc for basic tasks like web browsing and email, then you can get away with less powerful components.
Follow Proper Assembly Instructions:
Once you have chosen all of the components for your Intel Nuc, it is important that you follow the proper assembly
What Parts Do You Need for an Intel Nuc?
If you’re looking to get the most out of your new Intel Nuc performance kit, there are a few things you’ll need to consider. In this article, we’ll go over what parts you’ll need to get the most out of your Nuc, as well as how to set it up for optimal performance.
First and foremost, you’ll need a compatible CPU. While any Intel processor will work with a Nuc, we recommend using an Intel Core i7 or i9 processor for the best results. These processors offer the best performance and will allow you to take full advantage of all the features of your Nuc.
Next, you’ll need to choose a motherboard that’s compatible with your processor. Again, any Intel motherboard will work, but we recommend choosing one that’s specifically designed for use with a Nuc. This will ensure that all of the features of your Nuc are fully supported and that you won’t run into any compatibility issues.
Finally, you’ll need to choose some memory for your Nuc. We recommend using DDR4 memory, as it offers the best performance and is fully compatible with all current Intel processors. Once you’ve chosen your memory, just install it in your Nuc according to the instructions included in your kit.
With these three components installed, your Nuc will be ready for optimal performance. Just make sure to keep everything updated and well-maintained so that you can enjoy years of trouble-free
How to Install an Intel Nuc
Installing an Intel Nuc is a simple process that can be completed in just a few minutes. Here’s how to do it:
1. Begin by powering off your computer and unplugging all cables.
2. Next, remove the case cover from your computer.
3. Locate the CPU socket on your motherboard and insert the Intel Nuc into it. Make sure that it is properly seated and secured.
4. Once the Nuc is in place, replace the case cover and reconnect all cables.
5. Finally, power on your computer and begin using it!
BIOS Settings for an Intel Nuc
One of the most important things you can do to ensure optimal performance from your new Intel Nuc is to configure the correct BIOS settings. While there are a number of different settings that can be adjusted, here are a few of the most important ones to keep in mind:
– Boot Order: Make sure that your boot device is set to “Hard Disk” or “SSD” first, and then set your optical drive as second in the boot order. This will help ensure that your Nuc boots from its internal storage drive first, which will help improve overall performance.
– SATA Controller Mode: The SATA controller on your Nuc should be configured for “AHCI” mode for best performance. This setting can usually be found in the “Advanced” or “Chipset” section of your BIOS.
– CPU Core Multiplier: If you want to overclock your Nuc’s CPU, you’ll need to adjust the core multiplier setting in the BIOS. By increasing this value, you can make each individual CPU core run at a higher speed, which can lead to better overall performance. Just be sure not to increase it too much, as doing so could cause instability issues.
Overclocking Your Intel Nuc
If you’re a PC gamer, you know that one of the best ways to get the most out of your new rig is to overclock it. And if you’re looking for a compact, powerful machine to build your gaming PC around, you can’t do better than an Intel Nuc. In this article, we’ll show you how to overclock your Intel Nuc so you can get the most out of your new build.
First, let’s talk about what overclocking is and why you might want to do it. Overclocking is the process of pushing your CPU beyond its stock speed in order to improve performance. By doing this, you can squeeze more frames per second out of your games, or make your applications run faster. Of course, there are risks involved with overclocking – if done incorrectly, it can lead to hardware damage. But if done correctly, it can be a safe and easy way to eke out a little extra performance from your system.
Now that we’ve covered the basics, let’s take a look at how to overclock your Intel Nuc. The first thing you’ll need to do is head into the BIOS and enable overclocking. Once that’s done, you’ll need to increase the CPU voltage and frequency in order to achieve stability at your desired speed. It’s important to note that each CPU is different and will require different settings in order for stable operation – so be sure to do your research before making any changes.
Tips and Tricks for Using an Intel Nuc
If you’re looking to get the most out of your new Intel Nuc performance kit, there are a few tips and tricks you can use to help optimize your setup. Here are a few things to keep in mind:
1. Make sure you have the latest BIOS and drivers installed. This will help ensure that your Nuc is running at its best.
2. Use high-quality components. This will help ensure that your Nuc performs as well as it can.
3. Overclock your Nuc. This will help boost its performance. However, be sure to do this carefully and only if you know what you’re doing, as it can void your warranty.
4. Keep your Nuc cool. This will help prevent any throttling or other issues that can occur when it gets too hot. You can use a fan or heatsink to help with this.
5. Use solid state storage. This will help improve boot times and overall performance of your Nuc.
6. Make sure you have adequate power supply for your needs. This is especially important if you’re planning on overclocking your Nuc
Conclusion
Overall, the Intel Nuc Performance Kit is a great way to get the most out of your new build. By following the tips in this article, you can ensure that you’ll be able to take full advantage of all the features and benefits that this kit has to offer. With its easy-to-use interface and powerful performance capabilities, the Intel Nuc Performance Kit is a must-have for any PC builder or enthusiast.